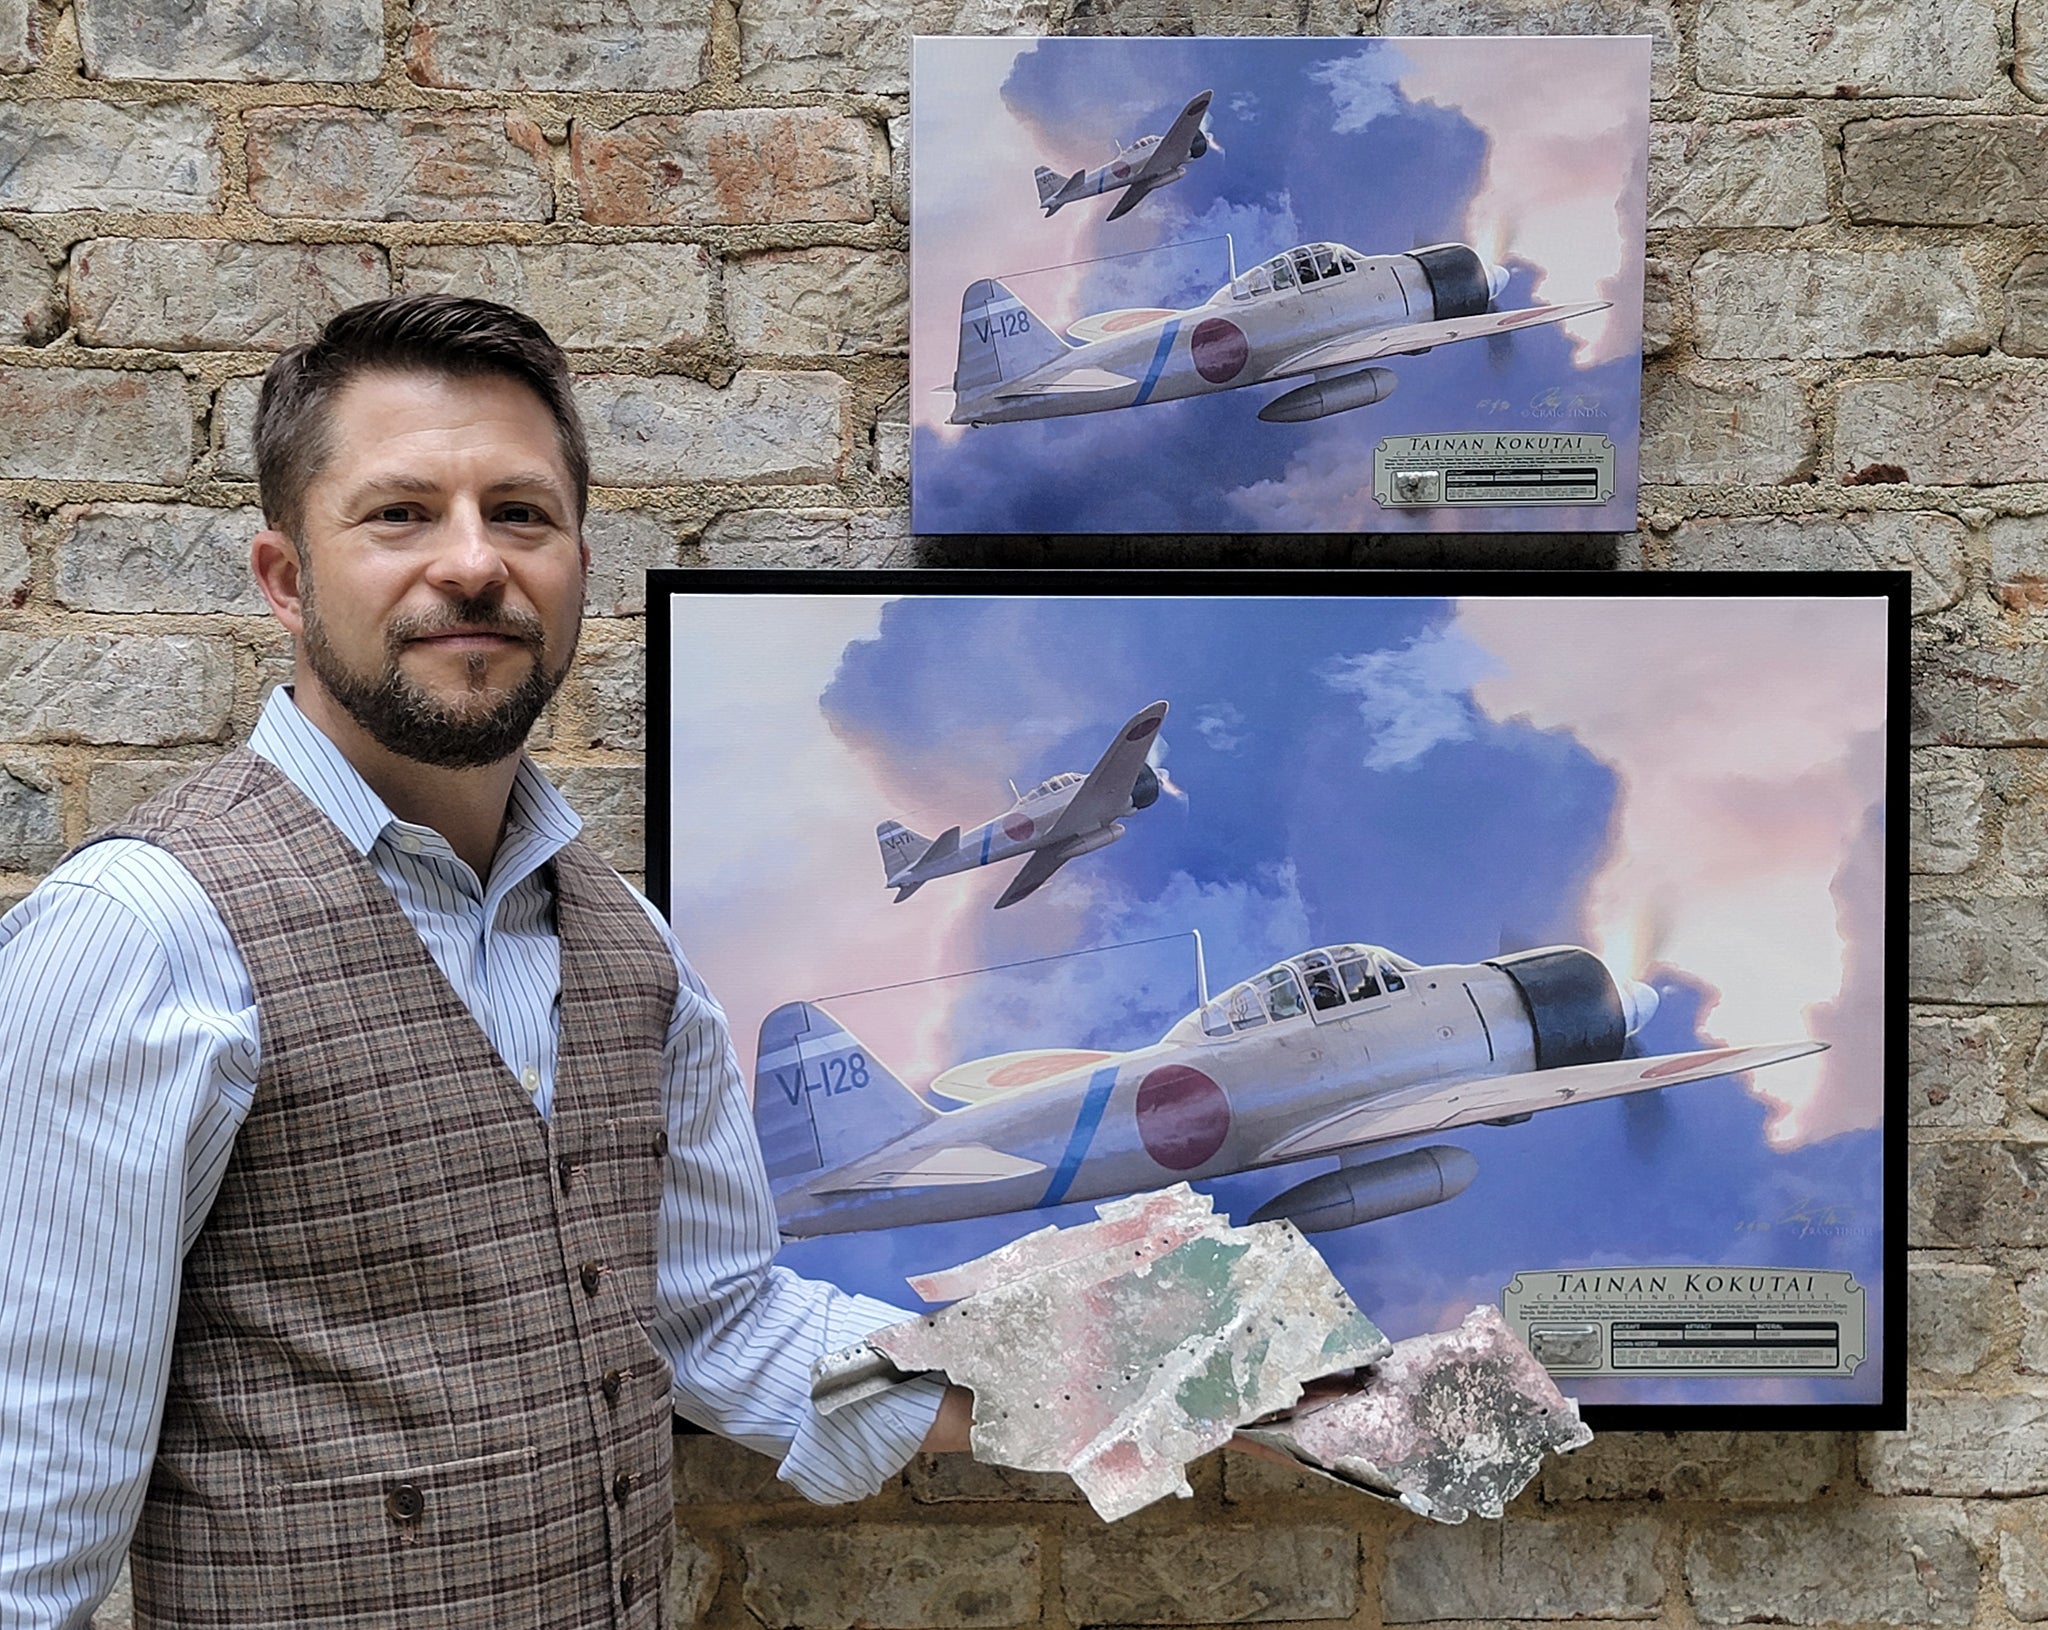
This Fine Art Print by Artist Craig Tinder depicts the early years depicts FP01c Saburo Sakai from the Tainan Kaigun Kokutai on 7 August 1942. This Limited Edition Canvas Print includes an extremely rare piece of wing aluminum skin from a Mitusbishi A6M2 Model 21 Zero from the same Sakai's same unit, Tainan Kokutai, that was recovered in the 1980s from Vunakanau Airfield Rabaul West in Papua New Guinea.
 Artist, Craig Tinder, holding A6M2 Zero fragment with the "Tainan Kokutai" limited edition prints
Details About the RELIC:
This genuine aluminum fragment originates comes from an A6M2 Model 21 Zero Fighter of the Tainan Kaigun Kokutai, the same unit served by WWII ace Saburo Sakai. Recovered in the 1980s and acquired through the Museum of the Pacific (which closed in 2016), the fragment originates from the outer wing section of the aircraft and still retains original Imperial Japanese Navy green paint along with remnants of the red Hinomaru, the Japanese national insignia.
 Close-up view of the A6M2 Zero - Tainan Kaigan Kokutai wing aluminum fragments
The aircraft (serial number unknown) was abandoned at Vunakanau Airfield in Papua New Guinea, known to the Japanese as "Rabaul Number 2." Like many Japanese fighters later in the war, this Zero adopted the green paint scheme used by the Imperial Japanese Navy. After decades of neglect, the aircraft was eventually moved to Tobera Airfield. Aces in Action obtained this and other relics from the Museum of the Pacific, which show clear evidence of the aircraft's original wartime paint scheme.
 Close-up view of the "Tainun Kokutai" art data plate with A6M2 Zero relic
The Story Behind the Print:
On 7 August 1942, Japanese flying ace Saburo Sakai led his squadron from the elite Tainan Kaigun Kokutai, a distinguished unit of the Imperial Japanese Navy, based at Lakunai Airfield near Rabaul in the New Britain Islands. During this mission, Sakai successfully claimed three kills, continuing to build his reputation as one of Japan’s top aces. However, while engaging a group of SBD Dauntless dive bombers, Sakai was severely wounded by return fire. Despite being blinded in one eye and losing consciousness for brief moments, Sakai managed to fly his damaged A6M Zero over 560 miles back to base, displaying incredible skill and determination.
 June 1942 - Tainan Kokutai (Papua New Guinea). Sakai is seated middle row, second from left
Saburo Sakai was one of only a few Japanese aces to survive the entire length of World War II. His combat experience began at the very onset of the conflict in December 1941, when Japan launched its surprise attacks across the Pacific. Sakai was part of the Tainan Kaigun Kokutai, one of Japan's premier fighter units, known for producing some of the most successful and skilled fighter pilots of the war. This squadron played a significant role in major Pacific battles, including those over the Philippines, Dutch East Indies, and later in the Solomon Islands campaign.
 Mitsubishi A6M2 Zero 4043 - Papua New Guinea post 1945
The Tainan Kaigun Kokutai, stationed at key bases like Rabaul, was tasked with providing air superiority over the Pacific theater and supporting Japanese ground and naval operations. Sakai and his squadron were involved in relentless air combat, facing off against Allied aircraft such as the Grumman F4F Wildcat and the Douglas SBD Dauntless. The unit’s elite pilots, including Sakai, made a significant impact during the early years of the war, with many of them achieving high kill counts in engagements over the vast Pacific.
Sakai is one of the few Japanese pilots who took part in the attack on Pearl Harbor, flew throughout the entire war, and survived.
To purchase, visit here.
Learn more about Spitfire vs. Japanese Zero in the Dance of the Skies, Click Here
Commissioned by Museums, Treasured by Collectors


Share:
Wolfpack Survivor, the story behind "Red Devil"
Cargo Legacy, the story behind "Over the Hump"